
Face Paint Kit - How to Refurbished a Briefcase
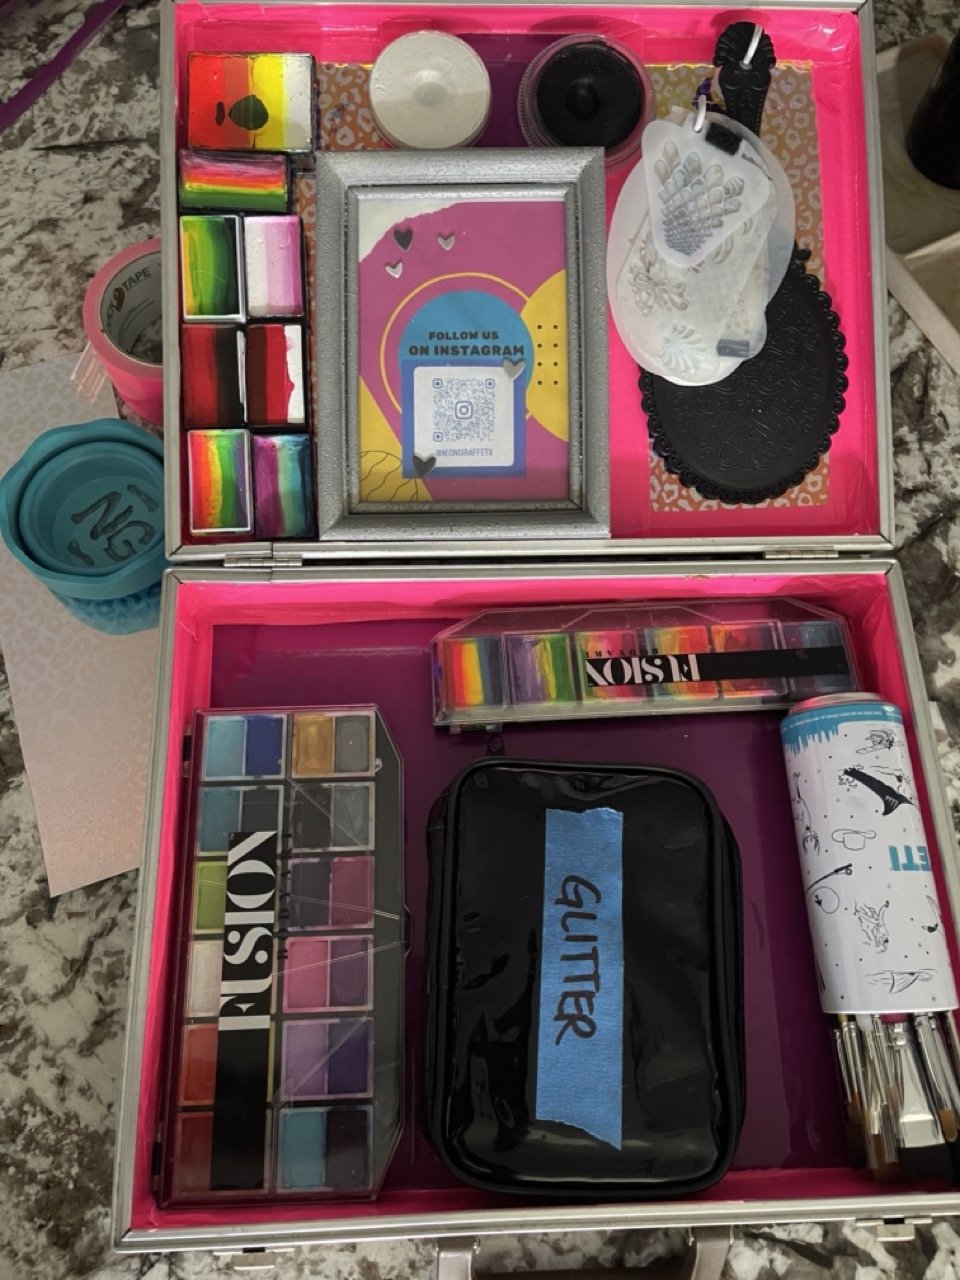
The final product! I love all the color and how it came out. Now I need a bigger version for my growing supplies!
Earlier in 2023, I started a journey to learn how to be a professional face painter. I have a great friend who has been painting for years who offered to show me the techniques she has learned, as well as share the business side of how things worked with me. I was intrigued, to say the least.
To say my confidence in my abilities was lacking, would be an understatement, but I was assured with the right tools, and the tips I would learn, I could get through my first gigs without completely embarrassing myself. I dove headfirst into the world of face painting, and I’m so glad I did!
The one issue I came across was that there is so much STUFF you can get to use on the job for this profession. I joined all the Facebook groups and followed all the top leaders in the field, and they all had super cute cases to hold all their supplies. One of the best brands for supplies is a case that costs over $500, and I was still an artist on a budget! SO…
I found a vintage suitcase and an old cassette tape briefcase on FB marketplace with the intention of refurbishing them into cases for my supplies. I started with the cassette tape case because 1) it was smaller, 2) it was only $5 so if I totally screwed it up, I wouldn’t be too upset, and 3) I didn’t really have a HUGE amount of supplies to go inside the case, the smaller case would be fine to start with.
I didn’t find many tutorials on how to make my own case, so I combined tips from a few different YouTube videos I found.
Here’s how I made my case:
Step 1: Find a case/vessel/container, etc
I found a “vintage” cassette tape holder/briefcase looking thing on Facebook Marketplace for $5. It was brown and boring with faux leather on the outside and some weird, smelly, vinyl lining on the inside. Not something fitting of the company name “Neon Giraffe”.
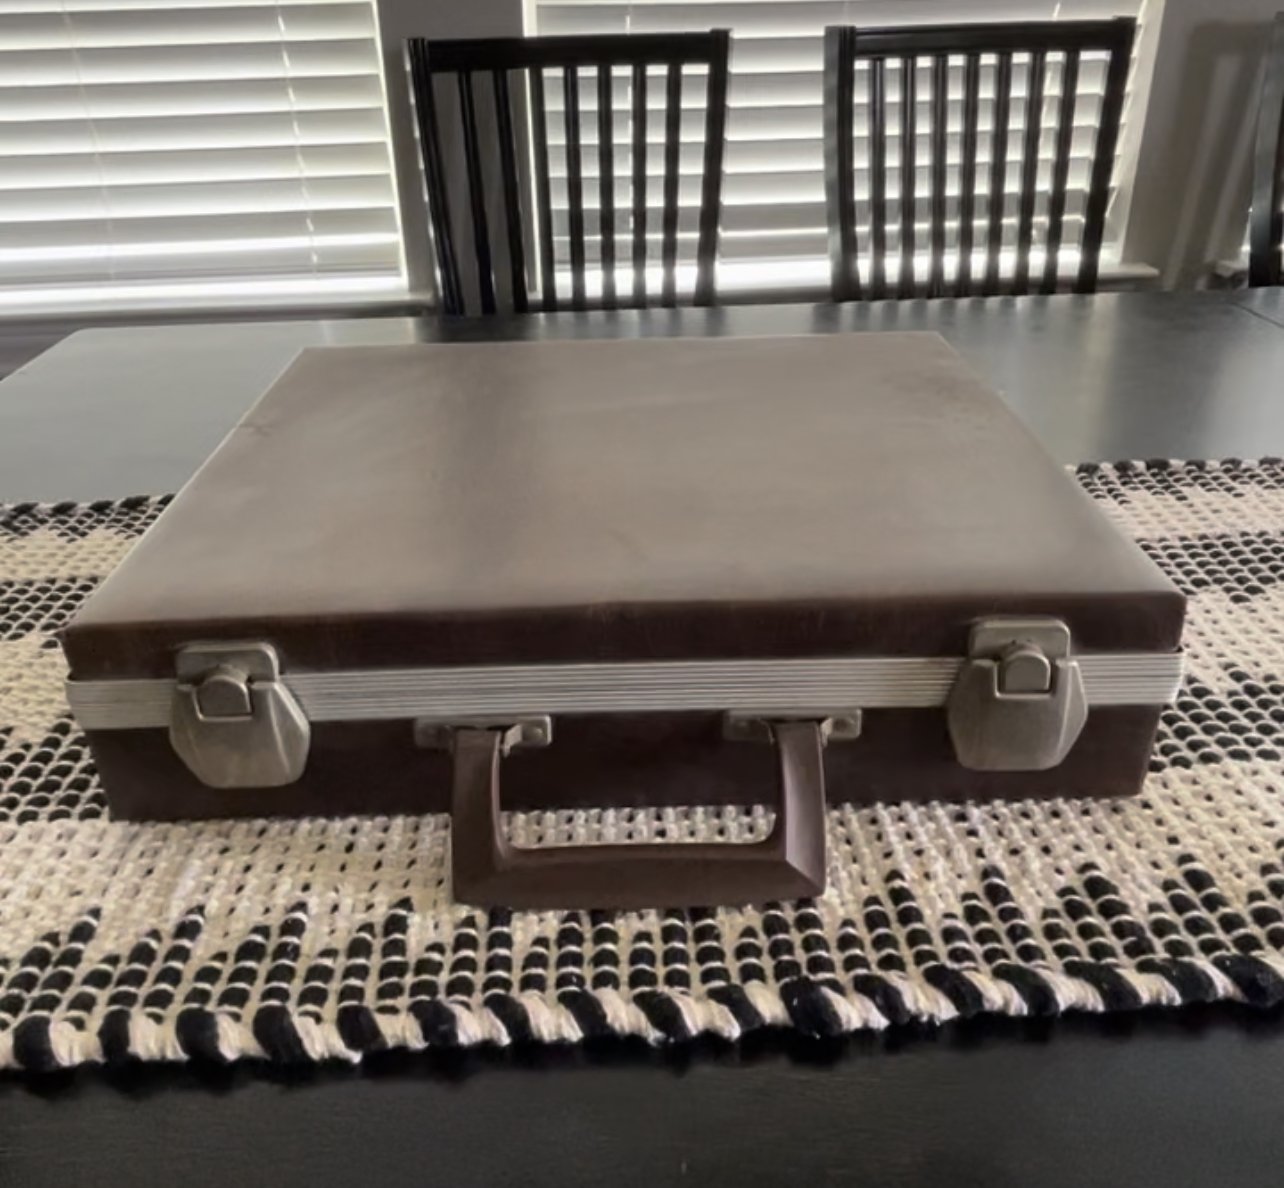
Exterior of case. Kind of boring, a little dirty.
Step 2: Clean up the case and remove the interior objects (AKA tape holders)
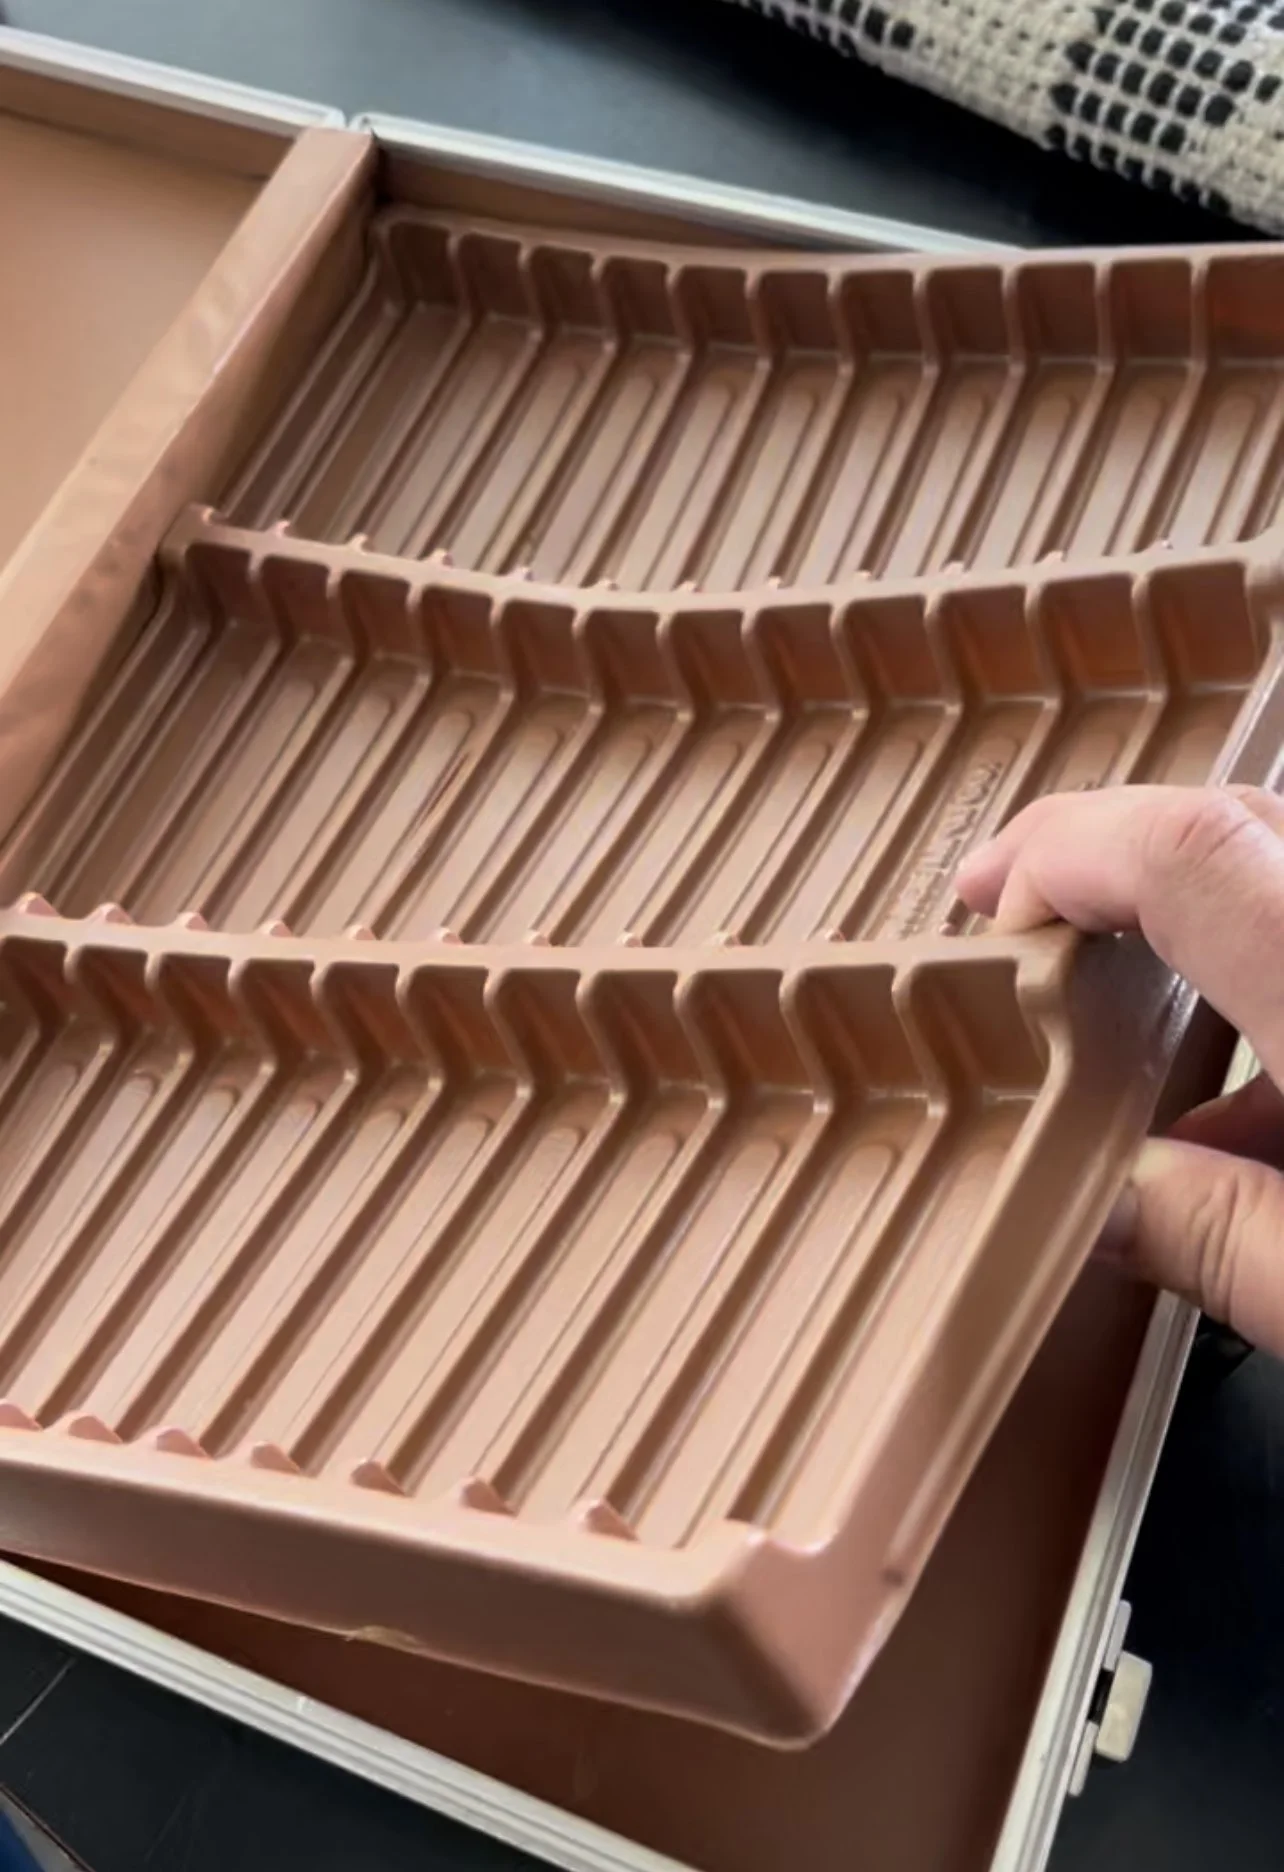
Screenshot of the video I took taking this out. It was only hot glued down in a few places so it was easy to just lift up and out of the case.
Step 3: Remove glue, and clean out the inside. I also removed the piece of vinyl that covered the hinges.

Interior of case once the cassette tape holder was removed. Removing the glue left behind was necessary to have a smooth surface to work with.
Step 4: Glue down the metal strap ties. I found these at Home Depot and they come in a bunch of different lengths. They were less than $1 each and I used 10 for each side, so the cost was around $20 for all the metal in the case. If I. were to use metal again, I might try something different., but these were easy and I didn’t have to cut anything for them to fit, so the size and effort worked for me. After gluing them in, the Gorilla Glue I used definitely foamed up and made the inside too textured, so I ended up sanding the residue off with my orbital sander. It was super quick. Then I wiped it all down with a damp rag.
I’ve also heard of some people using cookie/baking sheets. This might make the case a little lighter to carry.
For my second case, since it’s bigger, I plan to eliminate the metal step and just refinish the inside, then use velcro inside the case and also on the back of the items I want to store in the case, so that’s also an option.
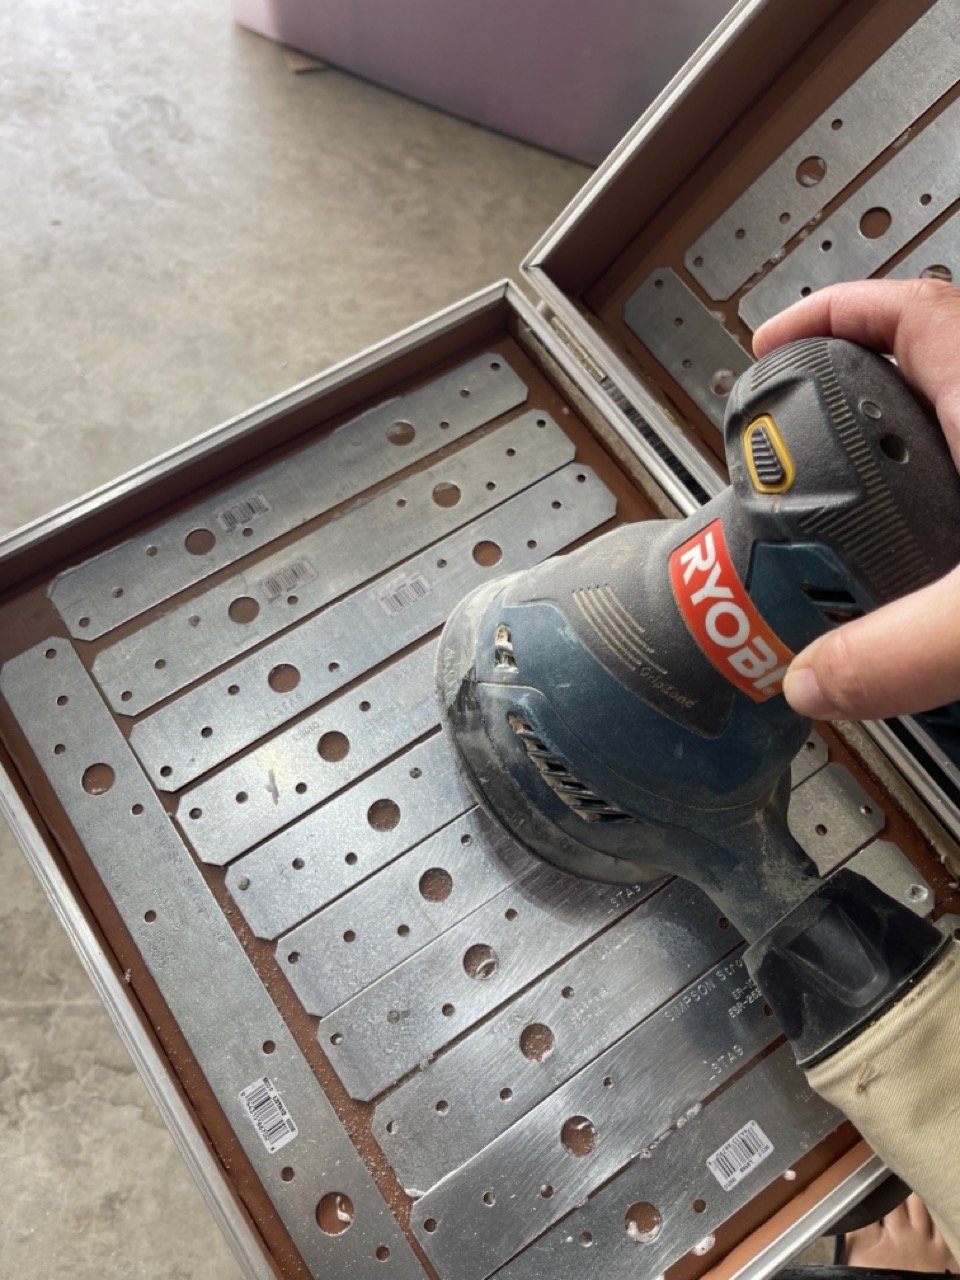
Metal strap ties glued down inside the case. The gorilla glue foamed up so I used an orbital sander to sand down the bumps. 180 grit sand paper is all I had on hand and it worked great.
Step 5: GLAM! I used a purple adhesive vinyl I found online (Less than $8 for a huge roll) and hot pink duct tape (less than $4). The vinyl came with a printed piece of hologram cheetah vinyl as well, so I used that to add a little more visual interest to the background.

Inside of the case after all the modifications were made.
I absolutely love how this came out! Now I’m planning the exterior of the case, I can’t wait to show you how that comes out!!
See the video of the case filled with my supplies HERE!
What do you thing? I’d love to hear your comments or about any projects you’ve undertaken recently. Tell me below!
I can’t wait to cheer you on!
XO,
Shannon